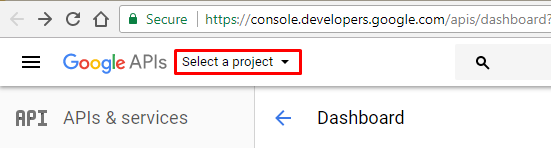
Visit the Google API console, and create a new project
To allow access to your Google Cloud Print printers, click on the link to your API console to take you to Google; then click on the option to create a new project in the “Project” menu:
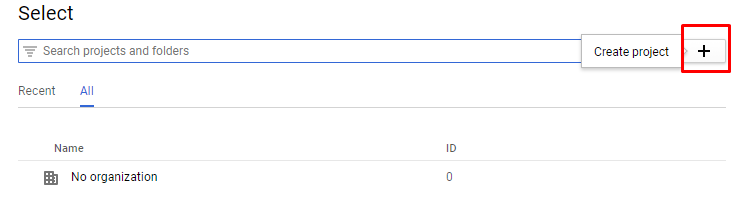
Choose “Select project” from the drop-down “Project” menu…
Click on “Create project” …
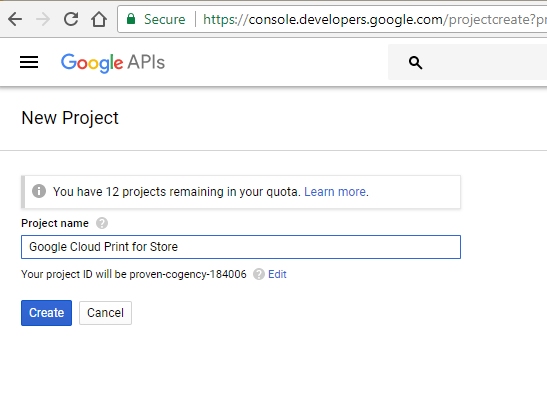
Enter “Project Name” in the Project Name Field…
Go to the Credentials to manage API credentials
Click on “Credentials” then “OAuth consent screen” then see something like the screenshot below.…
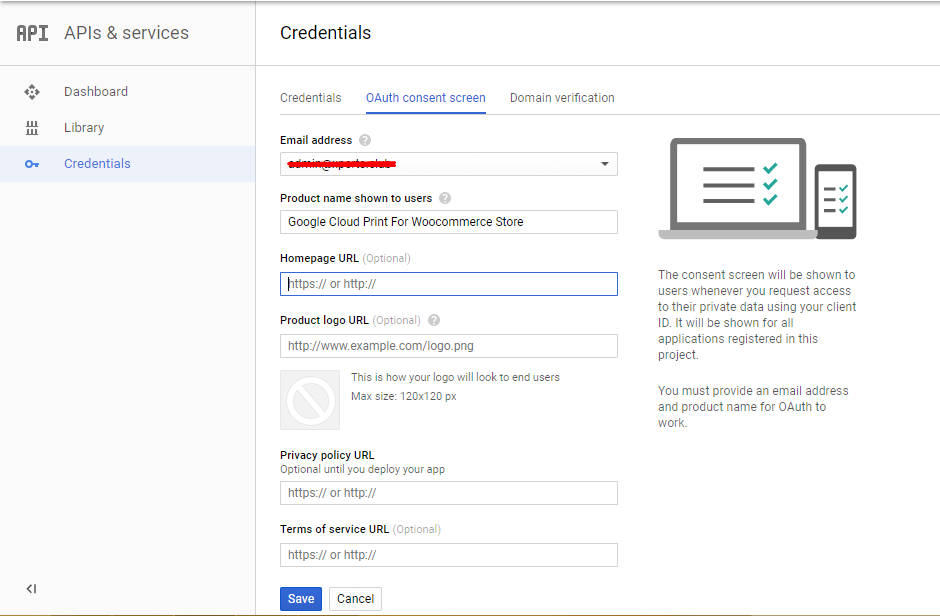
You will then probably be told that you need to give your application a name. When you have done so, it will bring you back to this screen.
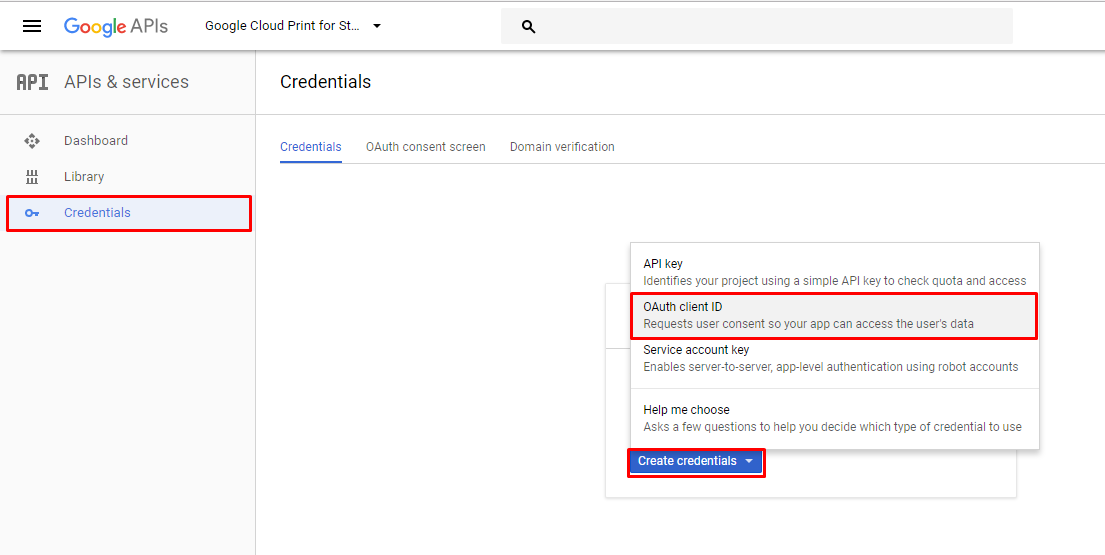
Click on “Credentials” then “Create credentials” then select “OAuth client ID”..
Choose “Web Application” as the application type
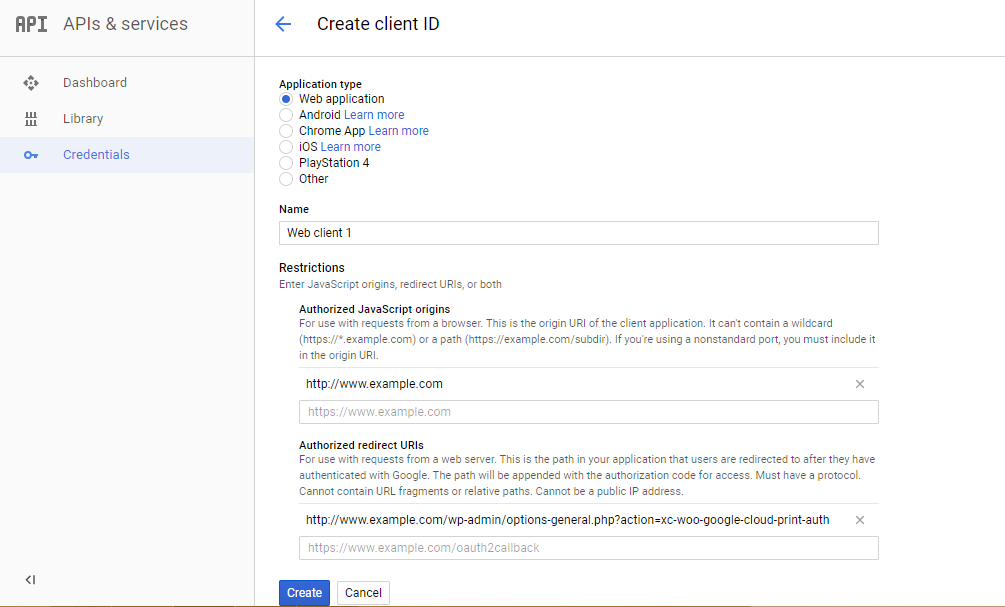
Next, enter some details:
For the name, enter any label you please – it does not matter.
When asked, paste in (as the “Authorized redirect URI”) the URL that was shown to you on your Google Cloud Print settings page back in your WordPress admin console: (do paste it from there – don’t copy any screenshot below).
For the “Authorized JavaScript origins”, enter the same thing but remove everything after the initial host name in the URL. i.e. something like http://www.example.com
Then press the “Create” button.
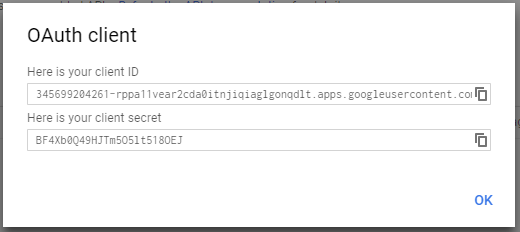
You will then be shown your client ID and secret.
Go back to your WordPress dashboard, and enter the details
You should now have a client ID created. Paste the details back into the Google Cloud Print settings page in your WordPress admin console. (Don’t copy our ones from the screenshot above – they are just an example, and will not work for you!). Save the settings.
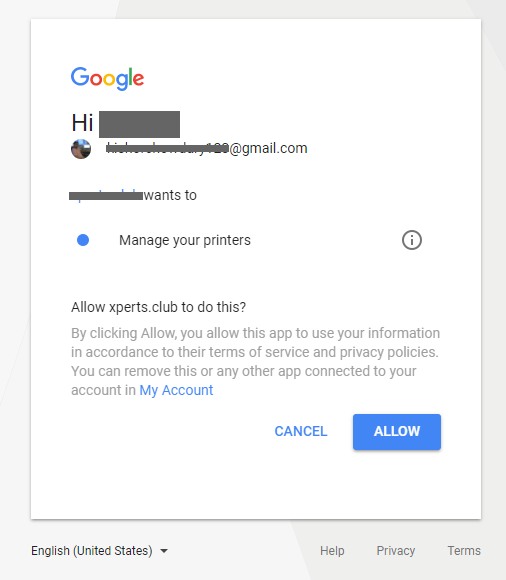
Then (i.e. after saving the settings), follow the link that WordPress will show you, to complete authorization.

Google will then show you a screen to confirm the authorization. The screenshot may not be identical to the one below:
After doing this, you’re done.